Last week, I was surprised to receive an email from Twitter saying that my application was suspended due to violating the terms of service. What actually happened is that Twitter started shutting down free apps that used v1.1 of the API, which is now reserved for paying customers. So if you also received the same notice, it doesn’t mean your app did anything wrong, it just means they want you to switch to the v2 API.
I figured it would be a relatively easy transition. Unfortunately, the Twitter developer portal is a confusing mess of settings and buttons and options that took me a while to figure out. This post walks you through the steps I took to create a new application that automates tweeting.
Note: Twitter allows free write access to the API. If you want to read from the API, in most cases you’ll need a paid account.
Apply for a developer account
If you don’t already have a developer account, go to the developer site and click “Developer Portal”. You’ll be greeted with a page that describes the Twitter API and asks you to subscribe for $100 USD/month. Under the “Subscribe” button, you’ll see “Apply for a Free Account”, and that’s what you should click.
Next, you’ll be asked to describe your use cases for accessing the Twitter API and accepting the terms of service. Once you submit the form, you’re immediately taken to the developer portal.
Set up your project and create your app
Once you are in the developer portal, you’ll first need to create a project and an app. These are created automatically for you when signing up for a free account from scratch; otherwise, if you already had a developer account, you’ll need to create these on your own. Make sure you set the environment to production so you can tweet to your account.
Either way, you’ll end up with API Key, API Key Secret, and Bearer token keys that you need to save for later. (You don’t actually need the Bearer token for the purposes of this post.)
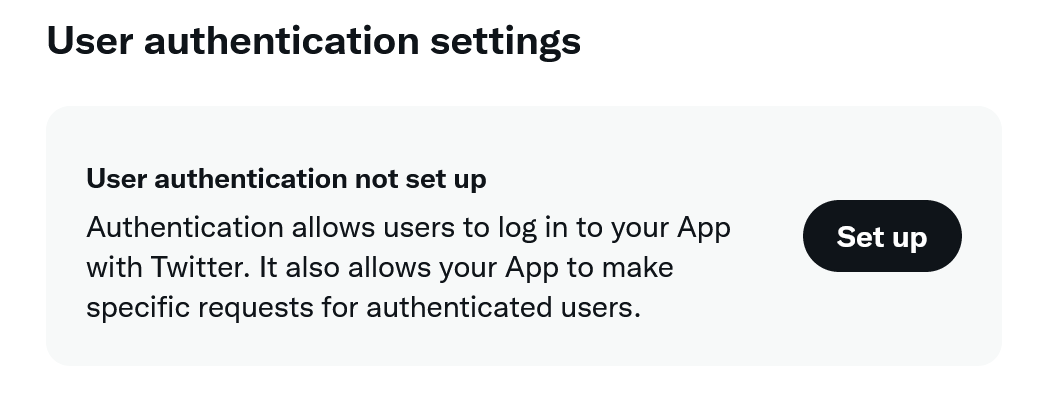
Set up write access (user authentication)
If you are only planning on reading from the Twitter API, you can skip this step. Otherwise, the next step is to set up user authentication for this application. Confusingly, you need to do this even if you just plan on tweeting as your own user and won’t be logging anyone in with their Twitter credentials. You won’t have write access to the API without enabling user authentication.
Click “Set up” under “User authentication” and you’ll be brought to another page with a variety of fields to fill in:
- Under “App Permissions” select “Read and write”
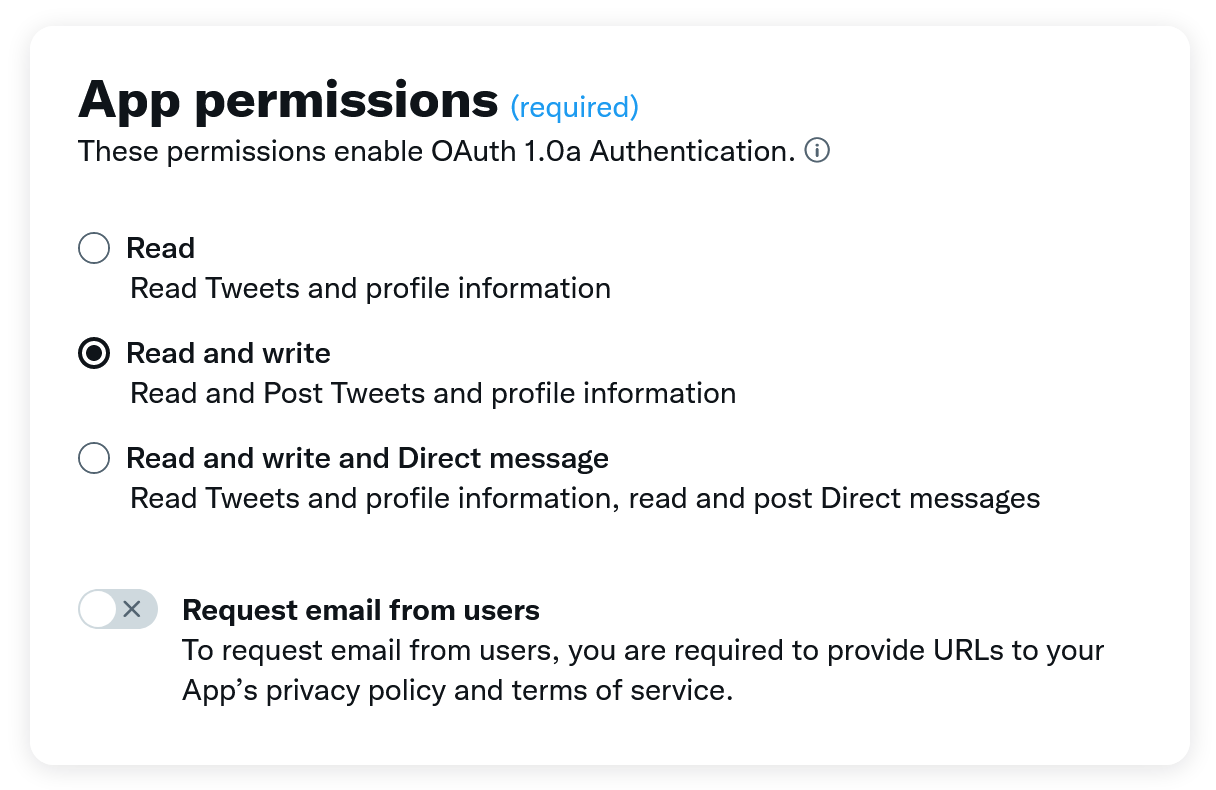
- Under “Type of App” select “Web App, Automated App, or Bot”
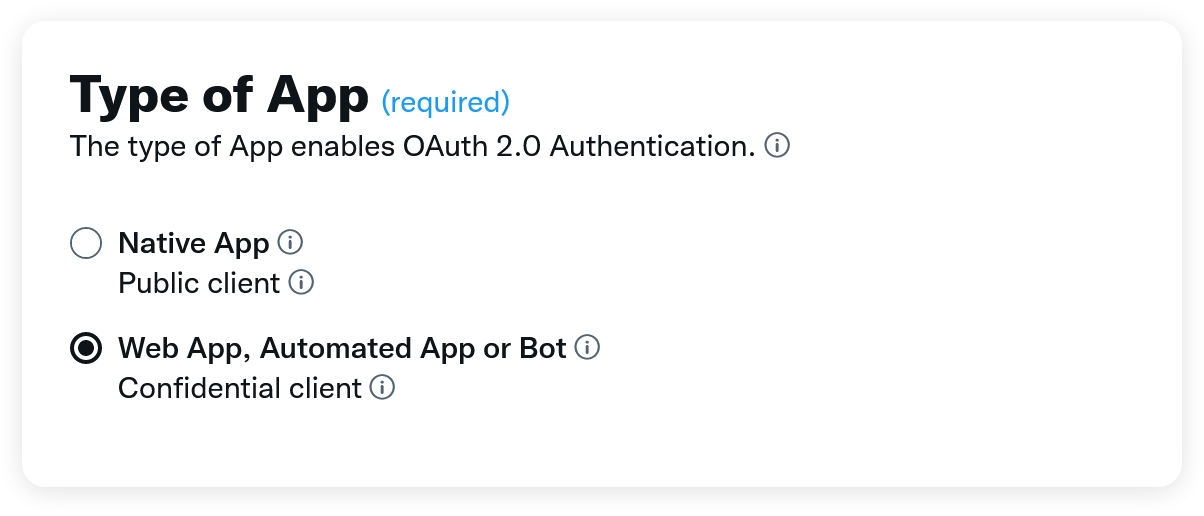
- Under “App Info” provide a Callback URI and Website URL (it doesn’t matter what you set for these as long as you aren’t using Twitter logins on your app)
- Click “Save”
At this point you’ll be greeted with a screen displaying your Client ID and Client Secret. This is used for Twitter login, and while you should save these in case you need them later, you won’t need them for only API access.
Generate your access token
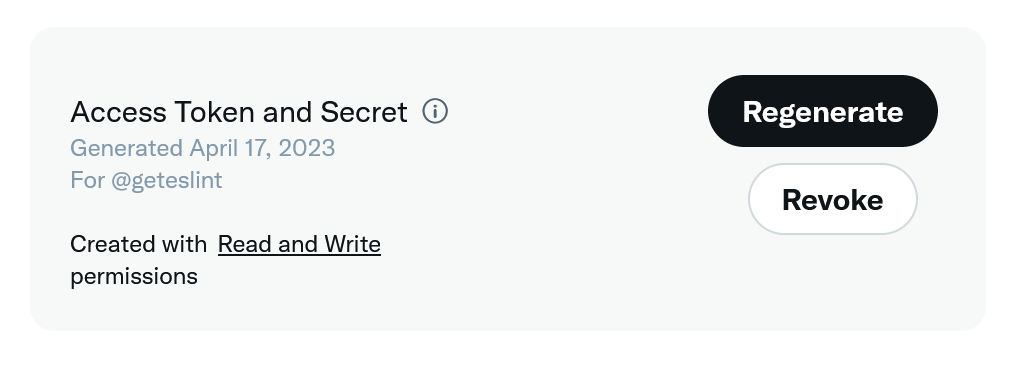
By default, your app can only access the Twitter API as an app, which has a very limited set of allowed operations. If you were setting up an app used Twitter login, the users would opt-in to allowing additional access. However, if you just want to tweet as the account who owns the app, you need to generate an access token and secret.
At the top of your app page, click “Keys and Tokens” and scroll down to the “Authentication Tokens” section. Next to “Access Token and Secret”, click “Generate”. You’ll be presented with your access token and secret. (You may also be presented with the same API Key, API Key Secret and Bearer token that you received when you first created the app. This appears to happen just the first time you generate an access token.)
Double-check back on your “Keys and Tokens” page that the access token was created with read and write permissions.
Tweet our your message
Once you have all of that set up, you can now send your first tweet via the v2 API. You’ll use the API Key and API Key Secret from the app and the access token and access token secret that are assigned to the user who owns the app. Here’s an example using the excellent twitter-api-v2 npm package:
import { TwitterApi } from "twitter-api-v2";

const client = new TwitterApi({

    // these two values come from your app's API keys
    appKey: TWITTER_API_KEY,
    appSecret: TWITTER_API_KEY_SECRET,

    // these two values come from the user's access tokens
    accessToken: TWITTER_ACCESS_TOKEN,
    accessSecret: TWITTER_ACCESS_TOKEN_SECRET
});

await client.v2.tweet("Hello world from the v2 Twitter API!");
And with that, you should see your tweet live within seconds.
Conclusion
The developer portal for creating and editing apps is a bit confusing and there are a lot of keys to keep track of. Ultimately, once have your API keys and access token, that’s all you need to tweet automatically. Just remember to enable user authentication (even if you really don’t need it) and set your app to have write permissions. Happy tweeting!